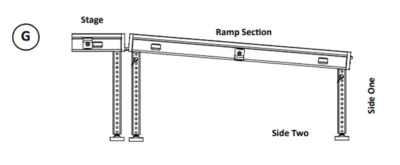
This ADA access ramp is free-standing and will work with both the Bil-Jax AS2100 Aluminum Staging System and the ST8100 Steel Staging System.
Tools:
ADA Components
- Lower hand rail kit (LH & RH)
- 4′ hand rails
- Upper hand rail kit (LH & RH)
- Filler guard rails
STEP 1 - INSTALLING FREE STANDING RAMP
A ramp should be installed at a 1” of rise to 12” of run. The height of a run is limited to 30” maximum before a landing is required. Determine the size and location of ramp. Example: a 24” tall stage will require a 24’ long ramp.
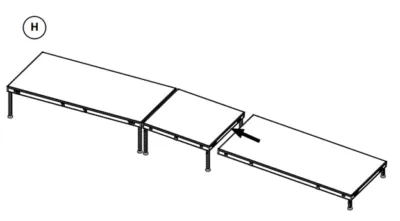
A) Start at top of ramp
Determine amount of decks required. If a 4′ × 4′ deck is required, begin with it.
Example: 24″ tall stage = 4′ deck + 8′ deck + 8′ deck + 4′ starter ramp.
B) Pull and hold pin
Hold pin in the unlocked position.
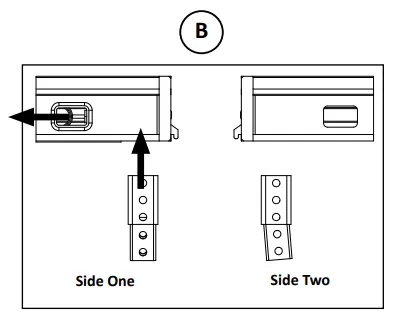
C) Insert ramp leg adapter
Fully insert a ramp leg adapter in the leg socket so that it touches the bottom of the stage deck.
D) Lock the adapter
Release pin to lock leg adapter in place.
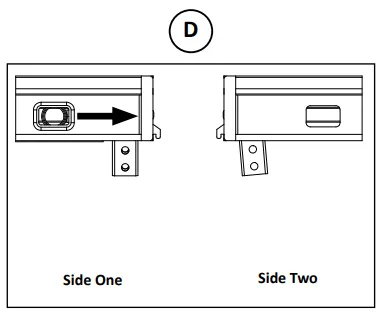
E) Tighten bolts
Tighten the leg socket wing bolt at each corner socket (underside of stage) where a leg adapter is installed.
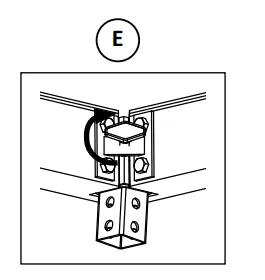
F) Attach ramp legs
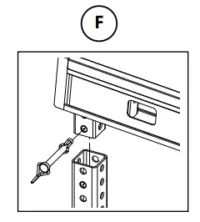
Attach 1-3/4″ sq. leg to ramp adapter with 2-3/8″ snap pin. Leg length (without base pad) is approx. 6″ shorter than desired ramp height at leg position.
G) Place deck against stage
Use four legs. Note: Downward facing side rail hooks must be against stage, and upward facing hooks at lower end of ramp.
H) Add more legs & attach next deck
Insert two legs into deck and attach to previous deck by inserting downward rail hook into the deck channel and lowering onto upward rail hooks.
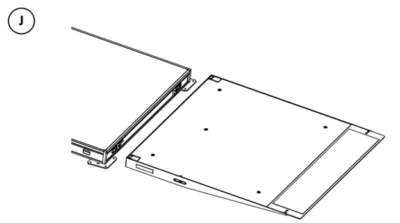
I) Final ramp deck height
The last ramp deck will be approx. 4″ above ground and will require ramp base plates instead of legs.
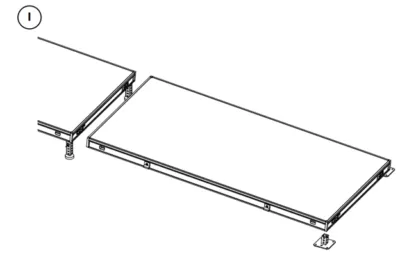
J) Complete the ramp
Place ramp end on upward facing rail hooks of the previous ramp deck.
Note: If a wider ramp is desired, follow the same instructions but attach a second row of decks side by side for each step as assembly proceeds.
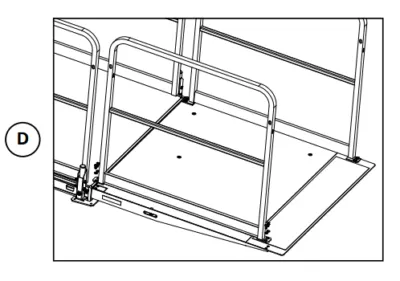
Step 2 – Attaching Ramp Guard Rails
A) Start at top of ramp
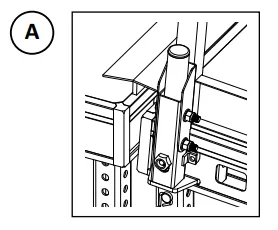
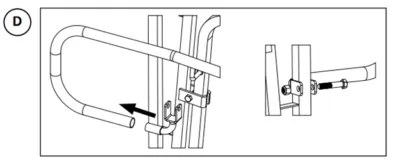
Set the lower lip of the two guard rail locks inside the stage deck channel along the sides of the stage deck ramp.
B) Pivot guard rail into position
Pivot guard rail toward the ramp until there is a “click” sound. This fully seats the T-Lock within the stage deck channel. Press down on plunger if necessary to seat T-Lock.
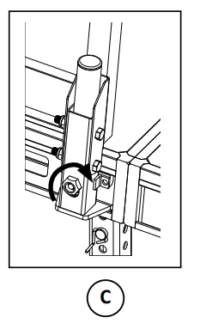
C) Tighten the hex nut
Tighten the hex nut on each lock to fully secure guard rail.
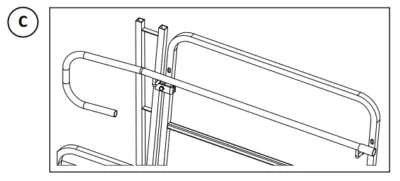
D) Install ramp end guard rail
The ramp end requires a special guard rail. Attach with four washers and 3/8″ × 1″ bolts.
Step 3 – Installing Ramp Hand Rails
A) Start at top of ramp
Insert ramp filler plate in gap between stage and ramp.
B) Attach filler guard rails
At top of ramp, place clamps around guard rail leg and tighten hex nuts.

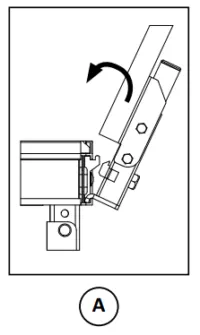
C) Attach upper hand rails
Place L-bolts into slots of guard rail and attach hex nuts. Do not tighten so adjustments can be made.
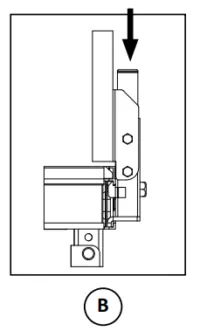
D) Attach hand rail support (upper)
Insert return into upper hand rail and rotate so saddle is around filler guard rail. Insert bolt and tighten hex nut.
E) Continue upper hand rail
Insert 4′ hand rail tube into end of upper rail, rotate so L-bolts align with guard rail slots, and loosely attach hex nuts. Repeat until ramp end guard rail is reached.
F) Insert lower hand rail
Insert into 4′ hand rail tube, rotate to align L-bolts, and loosely attach hex nuts.
G) Attach hand rail support (lower)
Insert return into end of lower hand rail, rotate so saddle is around the rail tube, insert bolt, and tighten hex nut.
H) Repeat
Repeat steps for hand rails on the other side of ramp.
I) Final tighten
Thoroughly tighten all hex nuts.